Thursday, August 8, 2013

be happy


So we've been working the guest bedroom lately and i've posted a few things (the curtains, the bed, etc) and we are now down to the details, which are fun and what i consider a personal challenge. i enjoy turning nothing into something or something old into something new.  

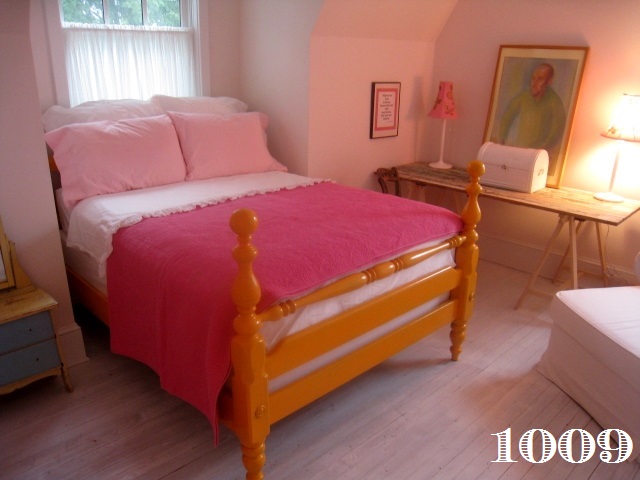
Today i decided to tackle some new "art" on the walls. This room has a cute dog-house dormer and charming arched walls which are a byproduct of the gabled roof.  anyway, i originally thought i would do twin beds in this room because they would just look so cute under these arches, but since we already owned the full size bed and the third floor guest room isn't exactly ready for furniture (where the full size bed will ultimately reside) this room will house for the moment a full size bed that fits charmingly inside the dormer.   that being said, before we moved in, i had the electrician rough in boxes for sconces to go over those "future" twin beds - guess where those boxes are right now..... that's right, behind the artwork in the picture below.  this artwork used to be in my old guest room so it was readily available and just the right size to hide the rough in boxes... but with the guest room coming together, they just didn't have the right feel anymore.  so i got to searching...


then i remembered the frames i had hanging in my old hallway


i have a dozen of these Ribba frames from Ikea - they're a great size and not anything super-expensive so i didn't feel bad about painting them and changing them up a bit. 


they used to frame this old damask scrap paper - it is so beautiful that it actually looks like fabric when behind glass, but this is not the look for the guestroom that is meant to feel cozy to grandchildren under the age of 5, so sadly it had to go....


i sat down at my desk and did what any thrifty designer would do - i went to pinterest to look for some inspiration and ultimately gave myself a headache - so i just decided to go with a simple, happy message.... be happy, be good. 


i already have the silhouette cameo, so cutting out letters would be a breeze


i sifted thru my collection of scrap paper and came up with a design that i felt would work well with the color scheme of the room. 


isn't this adorable paper - it's urban prairie petticoat #urp-1317


i set up the silhouette, selected a font (bambi bold - appropriate, right?!) 


after fidgeting with the font size, i went ahead and spray painted the frame and got to work.


i think one of the best little inventions is the double-sided tape rollers - 
they are clean, exact and precise - no waste, no mess.  
Pritt's are terrific and always hold like iron. 


here's the first layout - looks pretty happy, no?


i was so excited about how they looked that i never took a picture of the "be good" layout, so here's a picture of it in the frame on the wall!!


here they are side by side (the pinks are a perfect match!).


a hammer and a couple of 10-lb picture hangers....


and they're done!!


they're good and i'm happy!! 
(...and not a penny spent!!)


linked to:
Furniture Feature Fridays

Thursday, August 1, 2013

All in Good Time...

When we moved into this house two years ago, things were a little hectic. 


   We owned this house for a while.  It was built in the early 20's and then converted to a duplex somewhere in the 50's.  We had always intended to renovate it, but we rented it out for a little while when life took us in a different direction.  Anyway, when it became a struggle for my dad to get around in our old house we decided we should make the commitment to converting this house back to single family.  After all, there was already a first floor bedroom addition with a private bath and given the size of the renovation there was plenty of opportunity to create nice wide doorways and the perfect place to add a ramp on the back side of the wrap around porch.  Besides, the real estate market was sluggish and we'd probably have enough time to get it all done before we could move anyway.  Needless to say,  we sold our old house in a record 3 days and proceeded to settle 90 days later.  So much for a sluggish market... So we decided to focus on the critical rooms - and i do mean critical.  We made sure my dad's bedroom on the first floor was ready, the ramp for his increasingly necessary wheelchair, ada access in general on the first floor, our bedroom and bathroom - pretty much everything else was up for grabs.  I am still planning on writing my best selling cookbook, "haute-plate" cuisine - no joke.  i cooked on a hot plate in a kitchen full of boxes for the better part of 6 months before we got a stove - not a kitchen - a stove..... anyway, this is my long-winded way of explaining how someone could live in a house for two years with a room that looks like this....


This is (or should i say "was") our guest room.  
Notice that the window in the first photo is one type of window, and in the second photo it's another type of window?  That's because we were still in the process of installing windows on the second floor when we moved in.  Notice how there's no trim around anything - the windows, doors, floors.  How about that crazy floor finish - nice, right? Oh, and how about that temporary light hanging out of the ceiling in the first photo above...nice..


When spring broke this year (yes, this year) we finally got around to installing that missing window.  Which led to the trim in this room being finished, which led to paint, which led to the ceiling fan and outlets, and so on and so on - which led me to thinking about looking for a bed for this room. 


In seemingly no time, i found just what i was looking for - a cannonball bed - on craigslist for $40.00.  The added bonus, it fits perfectly into the dormer.  


As cute as the shape was, the finish was less than charming.  If you're new to this post, you might not know that i am a lifelong lover of pink, so my sister and my husband were both surprised when i decided to paint the bed a very cheery "sharp cheddar" orange.


Sharp Cheddar is a Benjamin Moore color, and i do love Benjamin Moore, but i am in LOVE with ACE Hardware's Royal Porch & Floor paint - it's an alkyd - and when they say gloss - they mean GLOSS... it is fantastic and finishes to the most beautiful shiny shell finish!


 So my favorite guys at Fisher's Hardware in Drexel Hill, PA mixed 
it up for me in a snap.


A Wooster Chinex brush is the perfect bristle for standing up to this 
thick-as-molasses finish.


Before I started to paint, I wiped the entire bed down with TSP by Jasco, to de-gloss the factory finish and prepare the surface for that beautiful glossy finish.  It was easy to mix, virtually odor free (which is not true of the powder version..) and took no time at all.


Just remember to wear gloves - cute ones. preferably pink...


Here's the first coat.


Look at that gloss only after one coat.


After completing the first coat.  I left the bed to dry under the newly installed ceiling fan - on high - for 24 hours before applying the second coat.


I was so excited about the bed, that I persuaded my husband that it was time to finish the floors.  Again, when we first moved in, we were going to install wall to wall sisal throughout the second floor, but didn't want to do it until everything was finished, so in the meantime we white washed the floors with a mix of 3 parts oil paint to 1 part mineral spirits.  The floors were in rough - and i do mean rough - shape so it was no heartbreak to paint them.  i have to admit, i like the finish so much, i'm not sure we'll ever see sisal in these parts. Again, at move-in, this room wasn't critical... 


So there you have it - two coats dried and beautifully glossy.
  
There's lots of cuteness in this room, but it really deserves a more thorough post than this - like everything else in this house.... all in good time...


all in good time.


linked to:

Furniture Feature Fridays